

Export Powershell Script to CSV

Introduction
Exporting data to CSV using a PowerShell script is an efficient way to manage and analyze your information.
This process can streamline your workflow by allowing seamless data transfer into universally recognized formats.
In this guide, we'll cover the steps to export data from PowerShell scripts to CSV files.
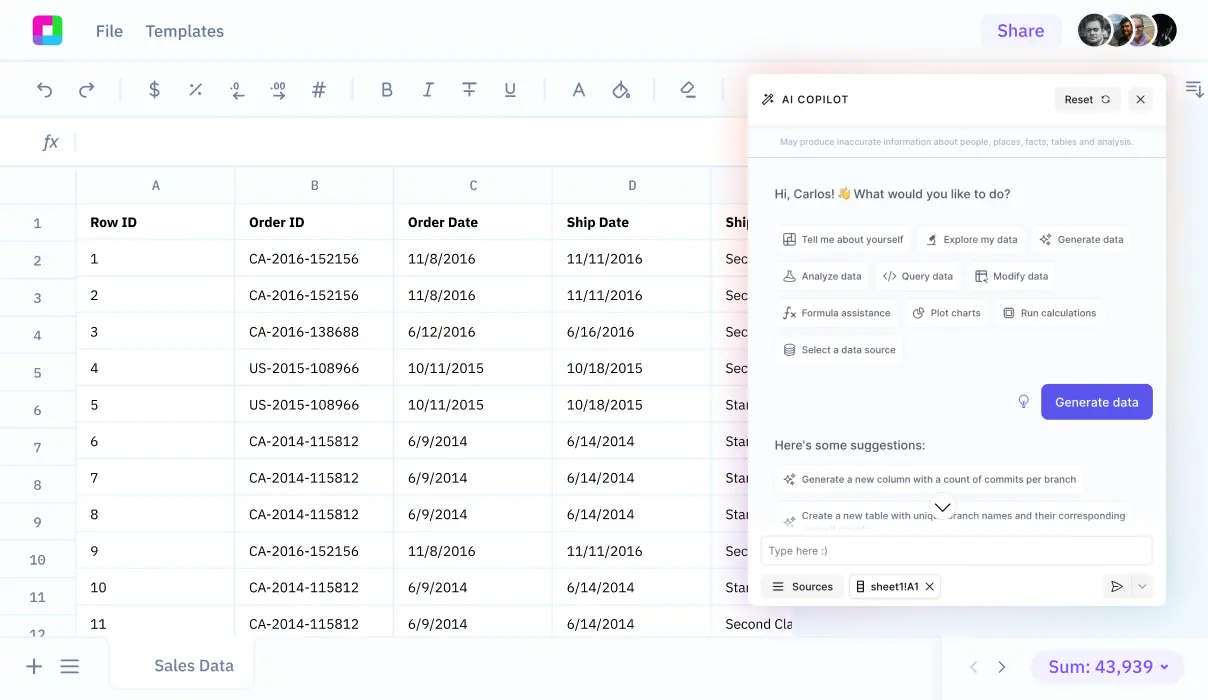
Additionally, we'll explore how Sourcetable lets you analyze your exported data with AI in a simple-to-use spreadsheet.
Exporting Data to CSV Format from a PowerShell Script
To export data to CSV format in a PowerShell script, you will use the Export-Csv cmdlet. This cmdlet converts objects to a series of CSV strings and saves them to a specified file. Each object is converted into a row in the CSV file, with each property of the object represented as a column.
Using Export-Csv Cmdlet
The Export-Csv cmdlet is designed to take objects as input, convert them to CSV format, and write the resulting CSV strings to a file. The cmdlet organizes the CSV file using the properties of the first object passed to it. If subsequent objects do not have the same properties, their values will be set to null in the CSV file.
Specifying the File Path
To specify where the CSV file should be saved, use the -Path parameter. This parameter takes a string representing the file path where the CSV file should be written. For example, to save the CSV file to a path ./data.csv, use the command: Export-Csv -Path ./data.csv.
Removing Type Information
By default, PowerShell versions 6.0 and later do not include type information in the CSV file. To exclude type information, use the -NoTypeInformation parameter. This parameter ensures that no type information is included in the CSV file, making it cleaner and more concise. For instance: Export-Csv -Path ./data.csv -NoTypeInformation.
Appending to Existing Files
To add CSV output to the end of an existing file without overwriting it, use the -Append parameter. This is useful for accumulating data across multiple export operations. An example command would be: Export-Csv -Path ./data.csv -Append.
Overwriting Read-Only Files
If you need to overwrite a file that has a Read Only attribute, the -Force parameter can be used. This will permit the Export-Csv cmdlet to overwrite files regardless of their attributes. For example: Export-Csv -Path ./data.csv -Force.
Selecting Specific Properties
To export specific properties from objects, use the Select-Object cmdlet along with Export-Csv. This allows you to control which properties of the objects are included in the CSV file. For instance, to select properties Name and ID: Get-Process | Select-Object -Property Name, ID | Export-Csv -Path ./data.csv -NoTypeInformation.
Example Uses
Here are some practical examples of using Export-Csv in PowerShell scripts:
Get-Process -Name WmiPrvSE | Select-Object -Property BasePriority, Id, SessionId, WorkingSet | Export-Csv -Path ./WmiData.csv -NoTypeInformation$AppService = Get-Service -DisplayName *Application* | Select-Object -Property DisplayName, Status; $AppService | Export-Csv -Path ./Services.csv -NoTypeInformation; $WinService = Get-Service -DisplayName *Windows* | Select-Object -Property DisplayName, Status; $WinService | Export-Csv -Path ./Services.csv -NoTypeInformation -AppendHow to Export Your Data to CSV Format Using PowerShell Script
Using the Export-Csv Cmdlet
To export data to a CSV file in PowerShell, use the Export-Csv cmdlet. This cmdlet converts objects into CSV strings and saves them to a file. Each object is represented as a row in the CSV file, with the properties of the object forming a character-separated list.
Specifying the File Path
Use the -Path parameter with the Export-Csv cmdlet to specify where to save the CSV file. This helps you control the destination of your exported data.
Omitting Type Information
The default behavior of the Export-Csv cmdlet is to exclude the #TYPE information header from the CSV output. If you wish to ensure this, use the -NoTypeInformation parameter.
Appending to Existing CSV Files
To add objects to an existing CSV file without overwriting it, use the -Append parameter. This allows you to continuously build your CSV file as new data becomes available.
Overwriting Read-Only Files
If you need to overwrite a file that has the Read Only attribute, use the -Force parameter with the Export-Csv cmdlet. This ensures that the export operation completes successfully even if the file is read-only.
Selecting Specific Properties
To export only specific properties of objects, use the Select-Object cmdlet to choose the properties before piping the objects to Export-Csv. This gives you control over the data included in your CSV file.
Creating and Sharing Spreadsheets
The Export-Csv cmdlet can be used to create spreadsheets that can be easily shared and imported into other programs that support CSV files. This is particularly useful for data analysis and reporting.
Recreating Objects from CSV
To recreate objects from CSV strings in a file, use the Import-Csv cmdlet. This allows you to import your exported data back into PowerShell for further manipulation or processing.
Export-Csv vs ConvertTo-Csv
While the ConvertTo-Csv cmdlet converts objects to CSV strings, it does not save them to a file. The Export-Csv cmdlet performs the same conversion but also writes the strings to a file, making it ideal for exporting data to CSV format.
PowerShell Script Use Cases
Task Automation
PowerShell scripting is essential for automating routine tasks such as data backup, log deletion, and software installation. It reduces human error, ensures consistency, and saves time.
Configuration Management
PowerShell scripts can manage and configure various system settings. This aids in standardizing configurations across multiple systems, simplifying management efforts.
System Administration
PowerShell is integral for system administration tasks. It provides capabilities to schedule tasks, process files in bulk, monitor and analyze system performance, and search and filter Windows logs.
IT Security and Compliance
PowerShell scripts enhance security by auditing and securing user credentials, enforcing password policies, and conducting IT security scans and vulnerability assessments. They also help ensure compliance with data privacy regulations.
Azure and 365 Interaction
PowerShell can interact with Azure and Microsoft 365 services. This capability enables administrators to manage cloud resources and services effectively, improving operational efficiency.
Reporting and Decision Making
PowerShell scripts can generate detailed reports and send them to decision-makers. This facilitates better data-driven decisions and strategic planning.
Deployment and Registry Modification
Scripts can be deployed to devices or users. Assigning scripts that modify the Local Machine Registry to devices may enhance deployment effectiveness, ensuring consistent and secure configurations.
Practical IT Management
PowerShell provides numerous examples for system administration, demonstrating various real-world scenarios. These examples help IT professionals effectively manage and maintain their systems.
Why Sourcetable is an Alternative for PowerShell Scripts
Sourcetable is a versatile spreadsheet solution that consolidates data from multiple sources into one unified interface. Unlike PowerShell scripts that require detailed coding, Sourcetable offers an intuitive, spreadsheet-like environment to manage and manipulate data seamlessly.
With Sourcetable, you can query databases in real-time, eliminating the complexities associated with scripting. This feature makes it easier to extract, analyze, and visualize data without the need for extensive programming knowledge.
Sourcetable's interface allows for immediate data manipulation, providing a user-friendly and direct alternative to PowerShell scripts. This ensures quick insights and better decision-making, expediting workflows and enhancing productivity.

Frequently Asked Questions
How can I export only specific properties of objects to a CSV file using PowerShell?
Use the Select-Object cmdlet to select specific properties of the objects before piping them to Export-Csv. For example:Get-Process -Name WmiPrvSE | Select-Object -Property BasePriority,Id,SessionId,WorkingSet | Export-Csv -Path ./WmiData.csv -NoTypeInformation
How can I ensure my PowerShell export includes the type information in the CSV file?
Use the -IncludeTypeInformation parameter with the Export-Csv cmdlet. For example:Get-Process | Export-Csv -Path ./Processes.csv -IncludeTypeInformation
What is the best practice to avoid formatting issues when exporting data to a CSV file using PowerShell?
Do not format objects before sending them to Export-Csv. Instead, use Select-Object to format only the required properties. For example:Get-Service | Select-Object -Property DisplayName, Status | Export-Csv -Path ./Services.csv -NoTypeInformation
How can I append data to an existing CSV file using PowerShell?
Use the -Append parameter with the Export-Csv cmdlet to add new data to an existing file. For example:$WinService = Get-Service -DisplayName *Windows* | Select-Object -Property DisplayName, Status$WinService | Export-Csv -Path ./Services.csv -NoTypeInformation -Append
What should I do if the Export-Csv command in PowerShell does not work as expected?
Ensure you are not formatting objects before sending them to Export-Csv, and use the Write-Output cmdlet for better control over the results. For example, the command Get-PowerBIWorkspace | Format-table | Export-Csv may not work as expected. Instead, use:Get-PowerBIWorkspace | Export-Csv -Path C:/Users/spaldg/Downloads/wksp.csv -NoTypeInformation -Delimiter ';'
Conclusion
Exporting data from PowerShell scripts to CSV is a straightforward process that enhances your data management capabilities. By leveraging the cmdlets `Export-Csv` and `ConvertTo-Csv`, you ensure that your data is organized and ready for further analysis.
Understanding these commands allows for more efficient data handling and preparation for subsequent processing steps. Mastery of PowerShell scripting provides you the agility needed for diverse data export tasks.
Sign up for Sourcetable to analyze your exported CSV data with AI in a simple-to-use spreadsheet.
Start working with Live Data
Al is here to help. Leverage the latest models to
analyze spreadsheets, enrich data, and create reports.